What Custom Object Snapshots Include
A Snapshot can include:
- Custom Objects
- Custom fields associated with those objects
- Supported associations between CRM objects
Associations are included automatically when both objects in the relationship are selected for the Snapshot. Contact-to-Contact associations are not supported in Snapshots.
Important: Snapshots copy reusable configuration assets. They do not function as a method for moving live customer records or account history between accounts.
Before You Begin
Make sure:
- The source account contains the Custom Objects you want to copy.
- Your user role has access to Snapshots.
- The destination account has enough available Custom Object capacity.
All current plans support up to 10 Custom Objects per location. Snapshot imports remain subject to the Custom Object limit in the destination account.
If Load Snapshot is unavailable, verify that Snapshot access is enabled under User → Roles and Permissions from the Admin Dashboard.
Custom Object Support in Snapshots
You can now include custom objects and all their associated custom fields (not limited to primary fields) within snapshots. This enables you to effortlessly copy custom object data across multiple accounts.
Custom Objects can only be copied between accounts. Direct export of custom objects is not supportedCustom Object Associations
Custom objects are automatically associated with other custom objects or contacts within the snapshot process. Associations are included by default and cannot be modified or deselected during snapshot creation.
Associations between custom objects and other objects (including contacts) will be automatically created or updated. You cannot manually edit these associations during the snapshot process. How to Copy Custom Objects Between Accounts
Snapshots let you reuse Custom Object configurations across accounts without rebuilding them manually.
When you include Custom Objects in a Snapshot, the platform can copy the selected objects, their custom fields, and supported associations into another account.
Custom Object records are not documented as Snapshot assets, so this article does not treat record data as transferable.
1. Navigate to Admin > Account Snapshots > Create Snapshot.
2. Select the custom object you want to include in the snapshot.
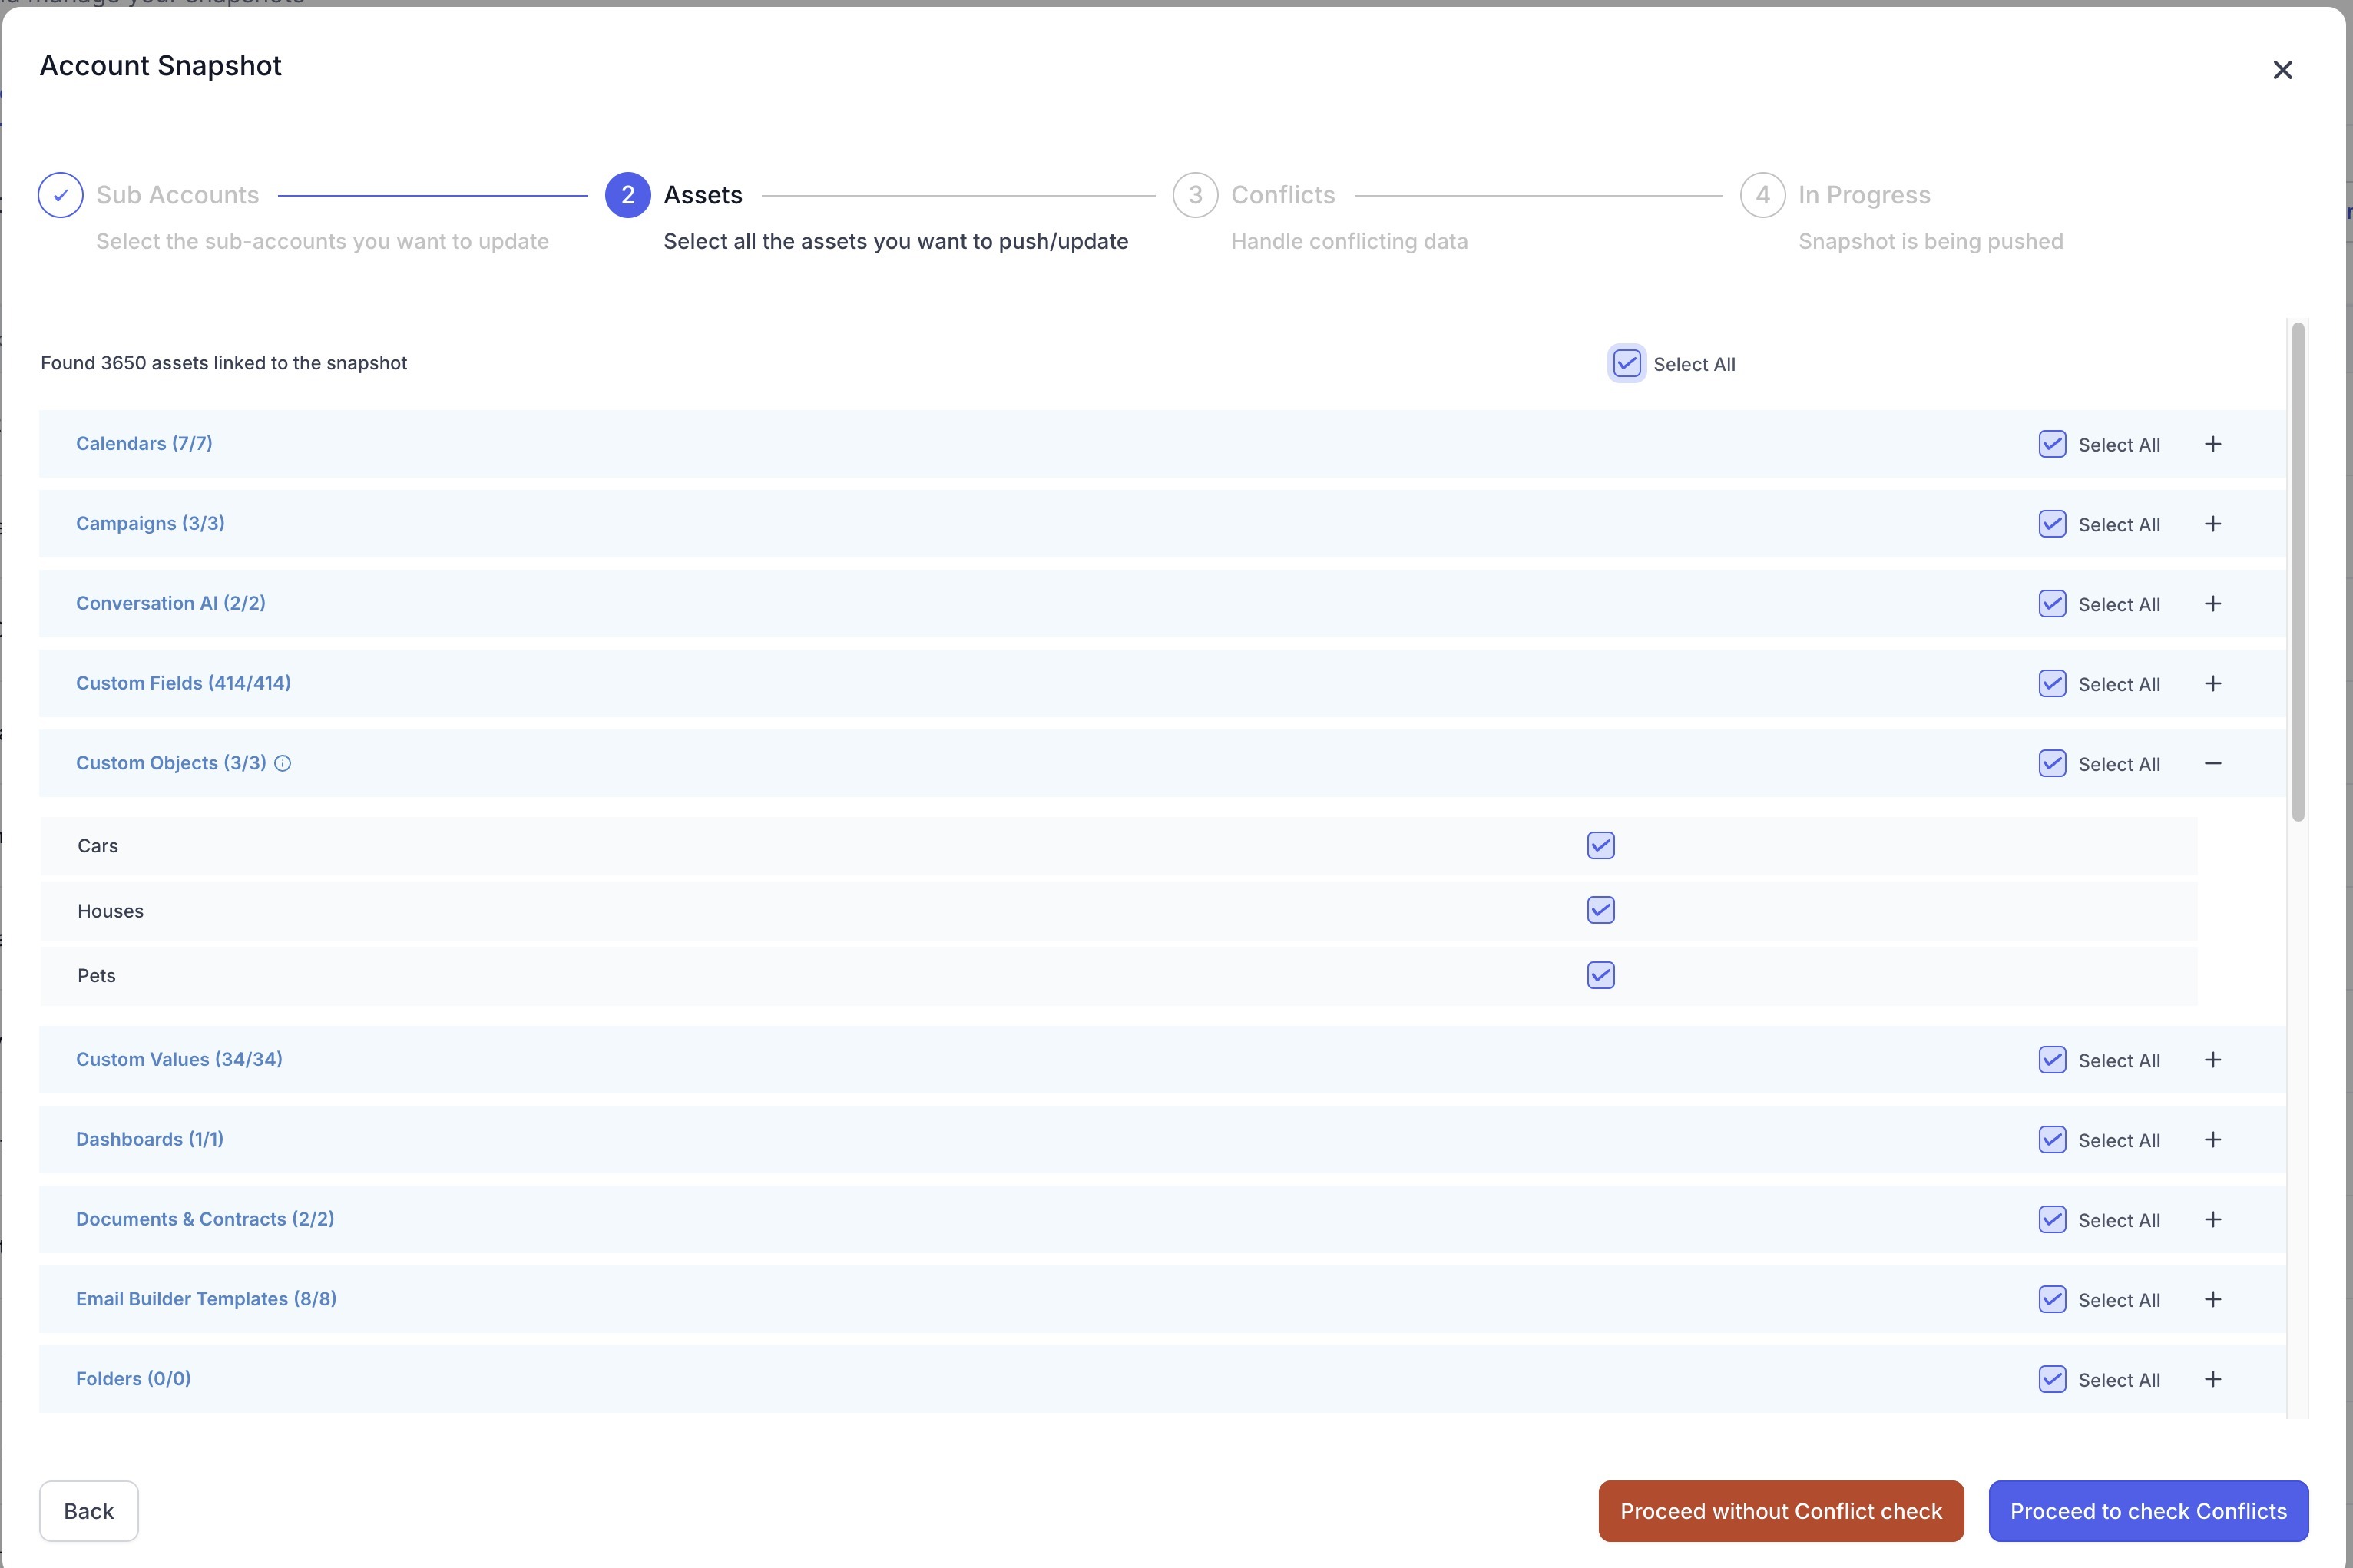
3. The selected custom object’s fields and associations (to other custom objects or contacts) will automatically be included.
4. Choose the source and target accounts to complete the snapshot transfer.
Custom objects smart lists in snapshots
You can also include Company Smart Lists and Custom Object Smart Lists in Account Snapshots.
This allows admins to create commonly used segments once and reuse the same Smart List configuration across multiple accounts instead of rebuilding filters and views for every client.
For example, you can reuse Smart Lists for:
- Companies by industry, lifecycle stage, account tier, or owner
- Properties by city, price, status, or property type
- Policies approaching renewal
- Memberships nearing expiry
- Any other segment built using Company or Custom Object fields
How to Add Smart Lists to a Snapshot
- Build and test the Smart List in the source account.
- Go to Admin → Account Snapshots.
- Create a new Snapshot or refresh an existing one.
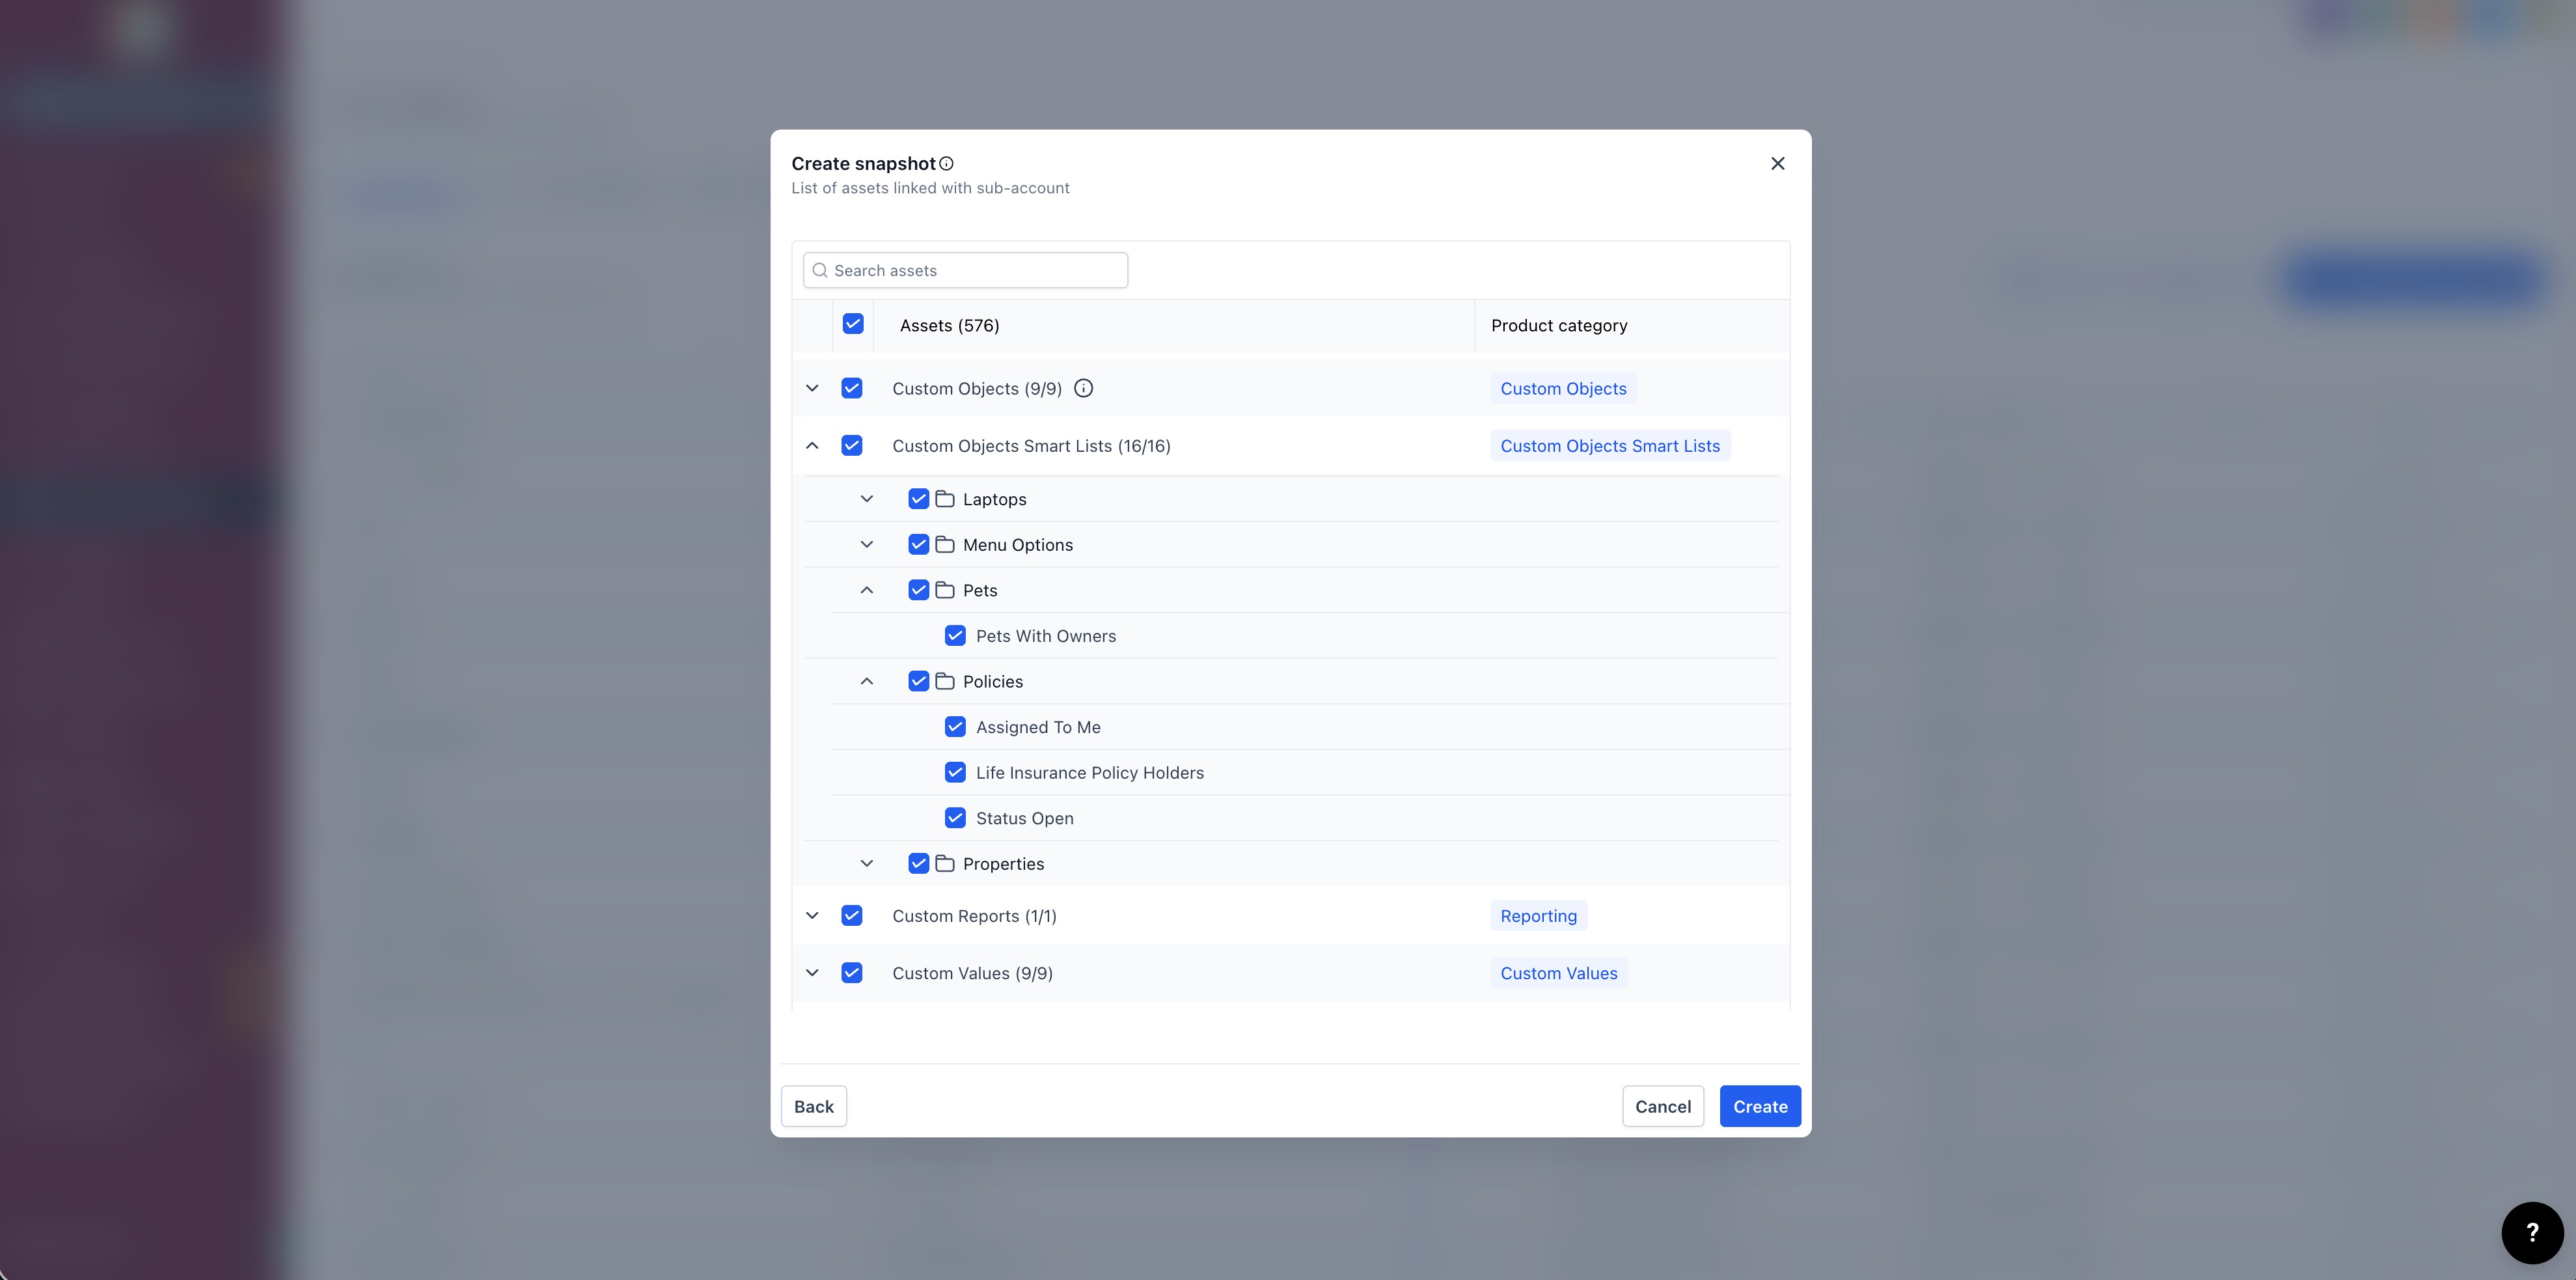
- Select the required Company Smart Lists and Custom Object Smart Lists.
- Include the underlying Custom Object and fields used by those Smart Lists.
- Save or refresh the Snapshot.
- Load or push the Snapshot to the destination account.
- Open the Company or Custom Object list in the destination account and verify the Smart List.
Important
Snapshots copy the Smart List configuration, not the records displayed in the Smart List.
The Smart List evaluates the records available in the destination account. For example, if a Smart List filters for Policy Status = Active, it will show whichever Policy records meet that condition in the destination account.
Make sure the Custom Object and fields referenced by a Smart List are also included in the Snapshot.
Important Limitations
Custom Object Limit per Snapshot:
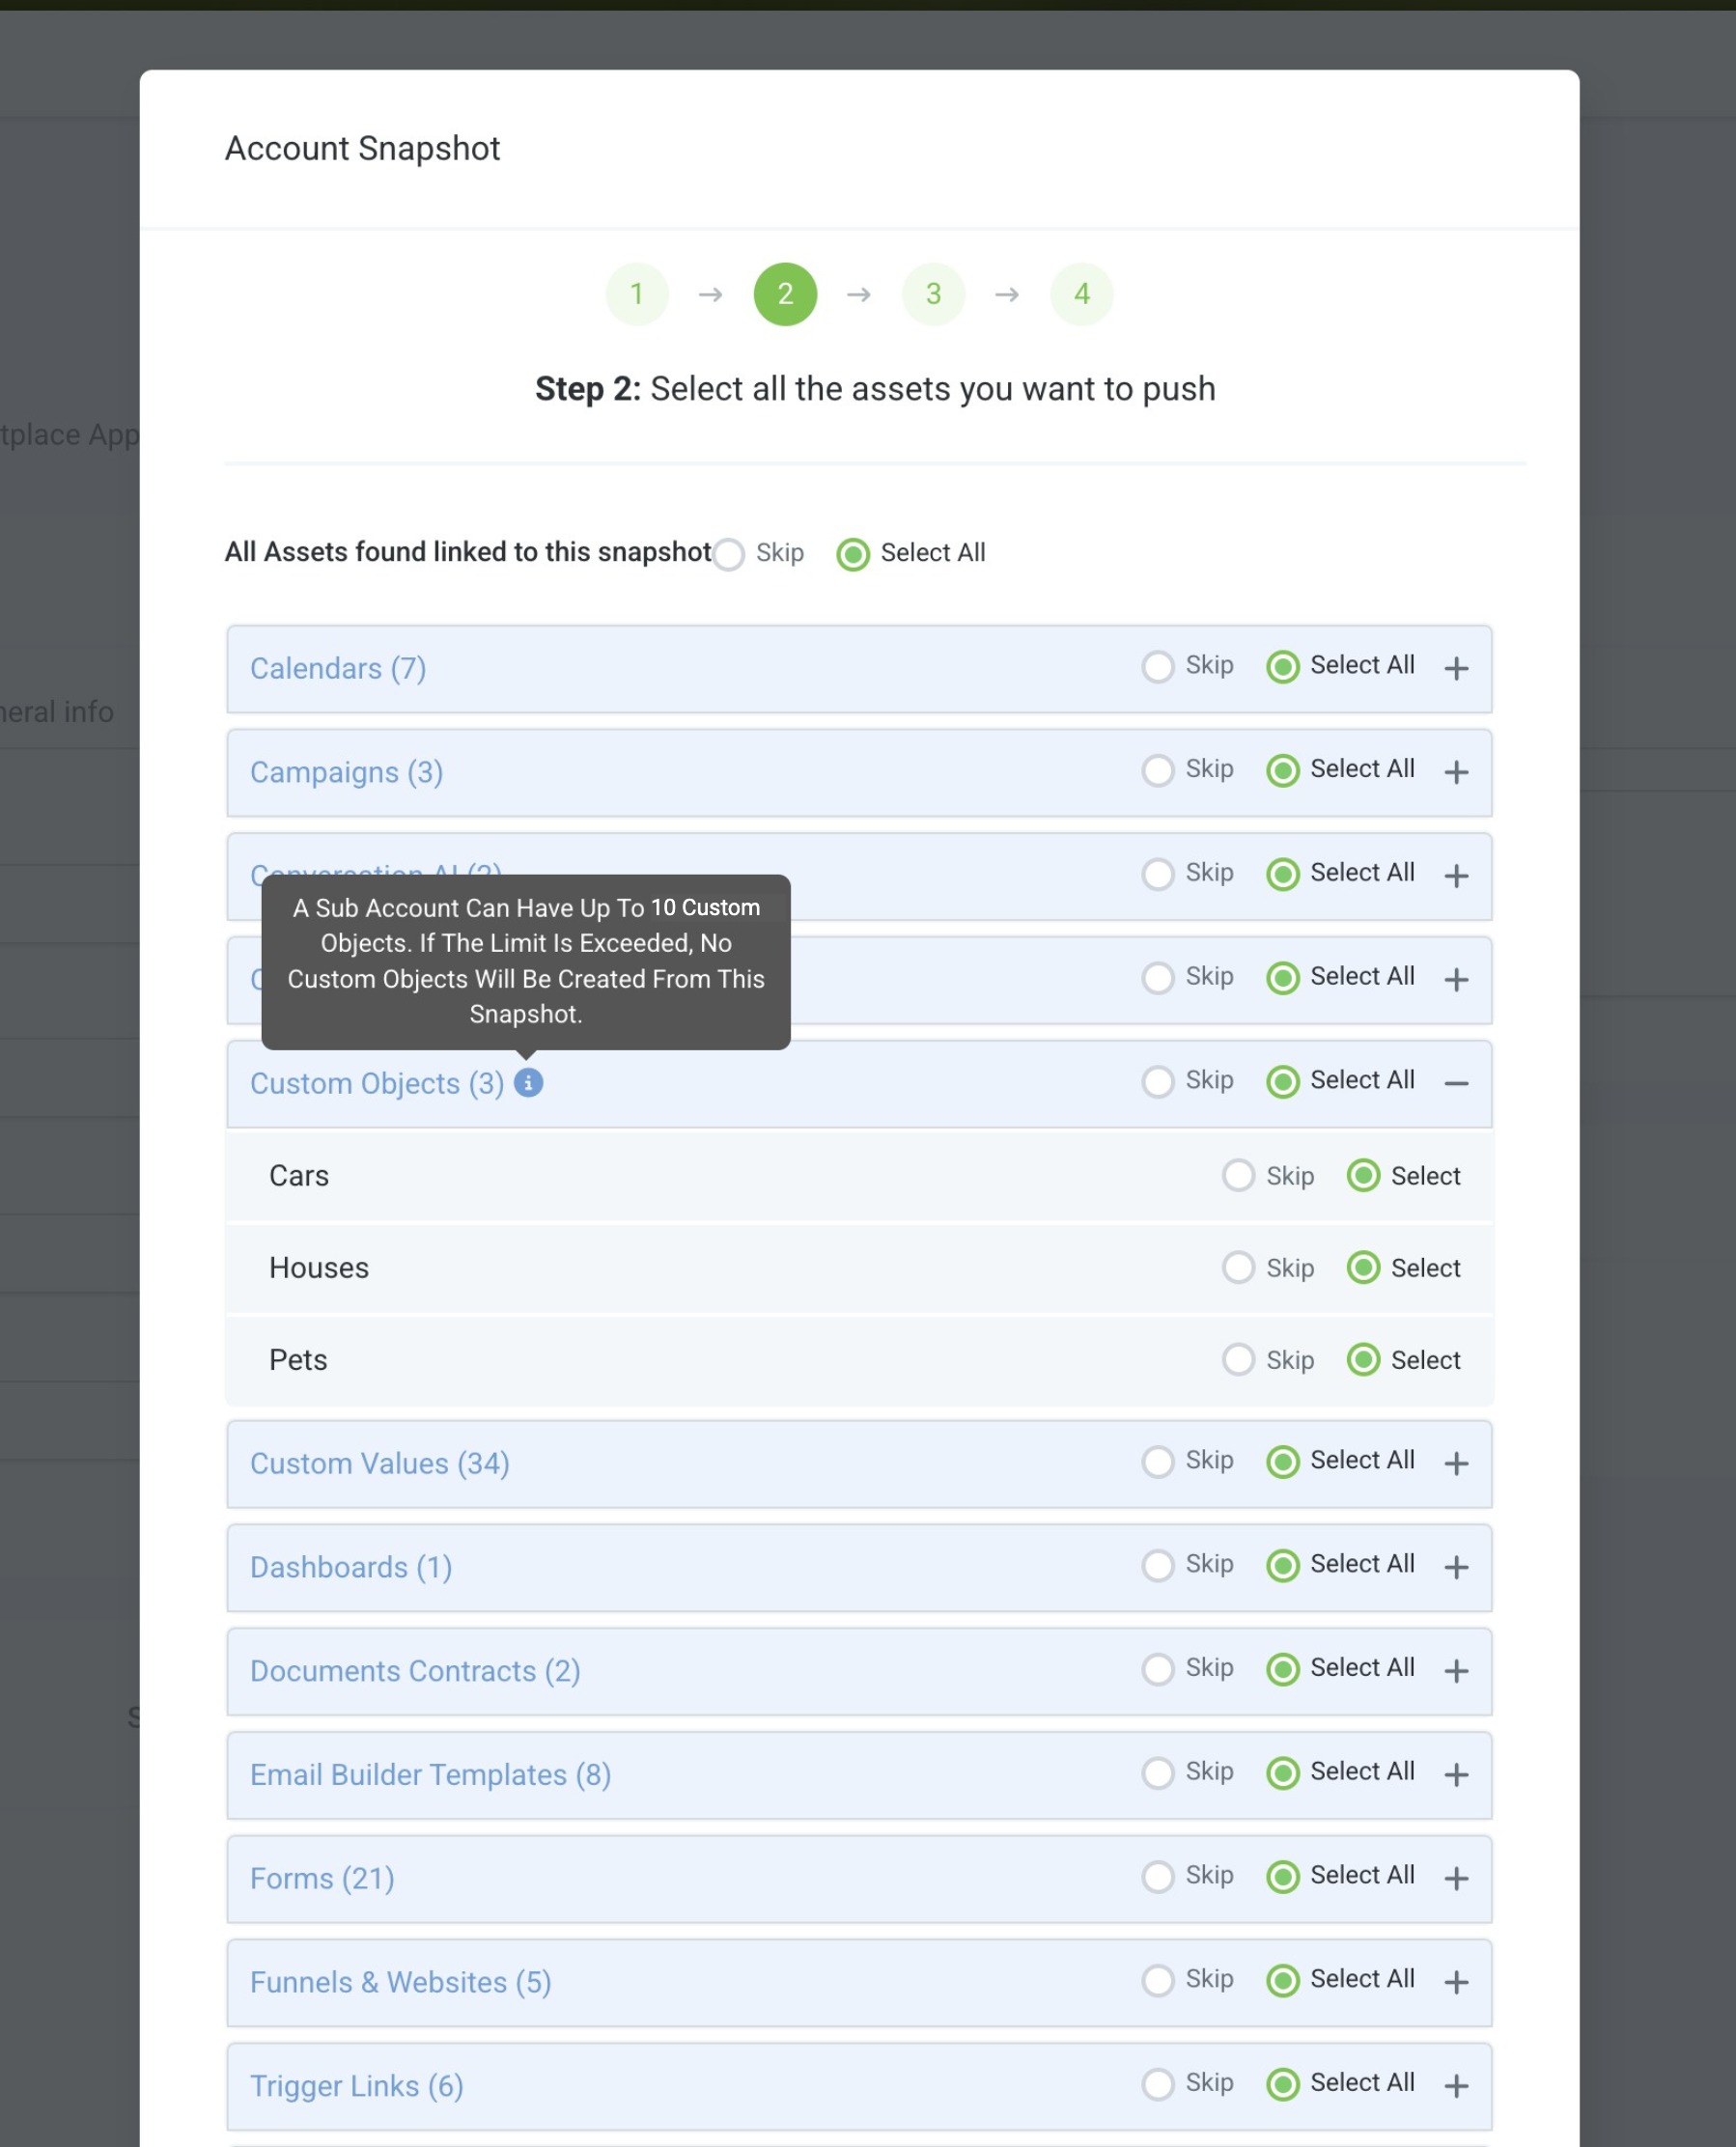
A snapshot can contain a maximum of 10 custom objects per account. If importing the snapshot would exceed this limit, no custom objects will be created in the target account.
Snapshots let you reuse Custom Object configurations across accounts without rebuilding them manually.
When you include Custom Objects in a Snapshot, the platform can copy the selected objects, their custom fields, and supported associations into another account. Custom Object records are not documented as Snapshot assets, so this article does not treat record data as transferable.
Frequently Asked Questions
Q. Can I copy Custom Objects between accounts?
Yes. Include the Custom Objects in a Snapshot, then load that Snapshot into the destination account. Custom fields and supported associations can be included with the objects.
Q. Do I need the Pro plan to use Custom Objects?
No. Starter, Unlimited, and Pro plans currently support up to 10 Custom Objects per location.
Q. Do Custom Object records transfer with a Snapshot?
Current Snapshot documentation describes Snapshots as tools for copying configuration assets rather than live account records. Do not treat Custom Object record data as part of the Snapshot transfer.
Q. Are associations included automatically?
Supported CRM associations are included automatically when both objects in the relationship are selected. Contact-to-Contact associations are not supported.
Q. Can I load more than one Snapshot into the same account?
Yes. The platform supports loading multiple Snapshots into the same account. Review conflicts carefully when assets overlap.
Was this article helpful?
That’s Great!
Thank you for your feedback
Sorry! We couldn't be helpful
Thank you for your feedback
Feedback sent
We appreciate your effort and will try to fix the article